Fresh sparkling water at home is one of the easiest ways to stay hydrated while reducing single-use plastic bottles. Whether you’ve purchased your first sparkling water maker or recently upgraded to a premium model, learning how to use it correctly will help you enjoy better carbonation, extend the life of your machine, and avoid common mistakes.
In this step-by-step guide, you’ll learn how to use a sparkling water maker safely, how to install the CO₂ cylinder, adjust carbonation levels, add flavors correctly, and maintain your machine for the best results.
How Does a Sparkling Water Maker Work?
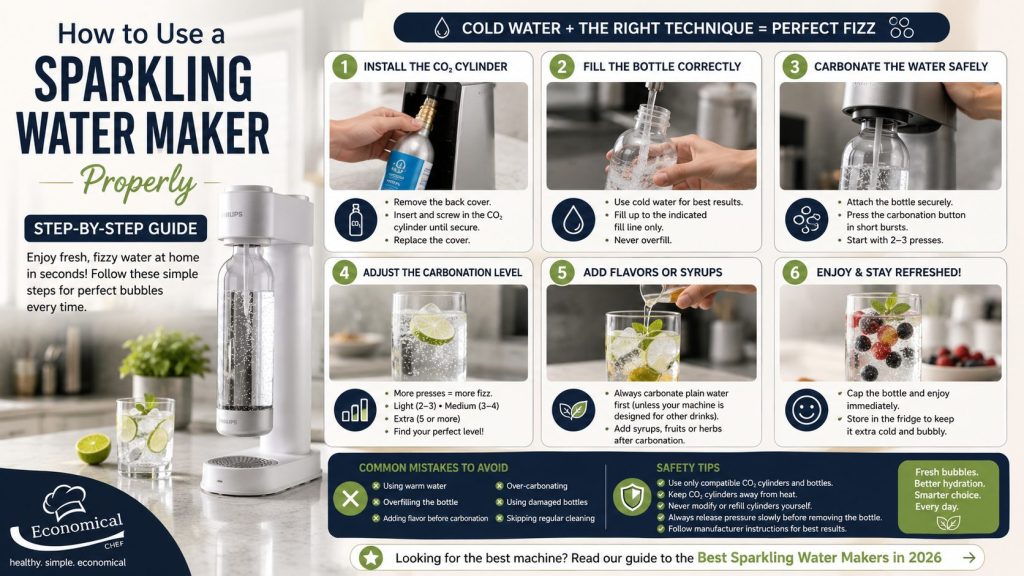
Looking for the perfect machine? Read our guide to the Best Sparkling Water Makers in 2026 on Economical Chef.
A sparkling water maker injects pressurized carbon dioxide (CO₂) into cold water, creating the bubbles that turn still water into sparkling water. Most home machines require three components:
- A sparkling water maker
- A compatible CO₂ cylinder
- A reusable carbonating bottle
When you press the carbonation button or lever, CO₂ is released into the bottle under pressure, where it dissolves into the water to create carbonation. Most models are designed to carbonate plain water only, while a few specialty machines can safely carbonate juices, tea, cocktails, and other beverages. Always follow your manufacturer’s instructions before carbonating anything besides water.
Step 1: Install the CO₂ Cylinder
Before using your machine, install the CO₂ cylinder according to your model’s instructions.
Generally, the process is simple:
- Remove the machine’s back cover.
- Remove the protective seal and cap from the CO₂ cylinder.
- Insert or screw the cylinder into place until it is secure.
- Replace the back cover.
Avoid overtightening the cylinder, and always use cylinders that are compatible with your machine. Most brands use either a screw-in or Quick Connect system.
Step 2: Fill the Bottle Correctly
Always fill the reusable bottle with cold water up to the indicated fill line.
Cold water absorbs carbon dioxide much more efficiently than warm water, resulting in stronger, longer-lasting bubbles. Many manufacturers recommend chilling the water in the refrigerator before carbonating.
Never overfill the bottle, as this leaves insufficient space for the gas to expand safely.
Step 3: Carbonate the Water Safely
Attach the bottle securely to the machine.
Once it’s locked into place:
- Press the carbonation button in short, firm bursts.
- Start with 2–3 presses for light carbonation.
- Add additional presses if you prefer stronger fizz.
- Wait briefly between presses to allow the gas to dissolve into the water.
After reaching your desired carbonation level, slowly remove the bottle to allow pressure to release gradually.
Step 4: Adjust the Carbonation Level
One of the biggest advantages of owning a sparkling water maker is customizing your bubbles.
As a general guide:
- Light fizz: 2–3 presses
- Medium fizz: 3–4 presses
- Extra sparkling: 5 or more presses (depending on your machine)
Experiment until you find the carbonation level you enjoy most. Some premium models also include adjustable carbonation settings or automatic carbonation programs.
Step 5: Add Flavors or Syrups
This is one of the most important rules:
Always carbonate plain water before adding flavors or syrups (unless your machine is specifically designed to carbonate other beverages).
Once the water is carbonated:
- Add fruit syrups.
- Add citrus juice.
- Add fresh herbs such as mint or basil.
- Add fruit slices like lemon, lime, or berries.
Then gently cap the bottle and swirl or shake lightly.
Adding syrup before carbonating can cause excessive foaming, clog the machine, and may even void the manufacturer’s warranty on many models.
Common Mistakes to Avoid
Avoid these mistakes to keep your sparkling water maker working properly:
- Filling above the maximum fill line.
- Using warm or room-temperature water.
- Carbonating juice or flavored drinks in machines intended only for water.
- Over-carbonating with excessive button presses.
- Using damaged or expired carbonating bottles.
- Forgetting to clean bottles and nozzles regularly.
Following the manufacturer’s instructions helps ensure consistent performance and extends the lifespan of your machine.
Safety Tips for First-Time Users
If you’re new to sparkling water makers, keep these safety tips in mind:
- Use only compatible CO₂ cylinders and bottles.
- Never attempt to modify or refill CO₂ cylinders yourself.
- Keep cylinders away from excessive heat.
- Replace reusable bottles according to the manufacturer’s recommended lifespan.
- Always release pressure slowly before removing the bottle.
- Store the machine on a stable, level countertop.
Taking a few extra precautions helps ensure safe operation and reliable carbonation every time.
Final Thoughts
Learning how to use a sparkling water maker is surprisingly simple, and once you’ve mastered the basics, you’ll be able to enjoy fresh sparkling water in just a few seconds. By using cold water, installing the CO₂ cylinder correctly, carbonating safely, and adding flavors only after carbonation, you’ll get the best performance from your machine while avoiding common mistakes.
Whether you enjoy plain sparkling water, homemade flavored drinks, or refreshing mocktails, a sparkling water maker offers a convenient and eco-friendly way to create fizzy beverages at home. If you’re still deciding which model to buy, be sure to read our comprehensive guide to the Best Sparkling Water Makers in 2026 to find the perfect machine for your kitchen.