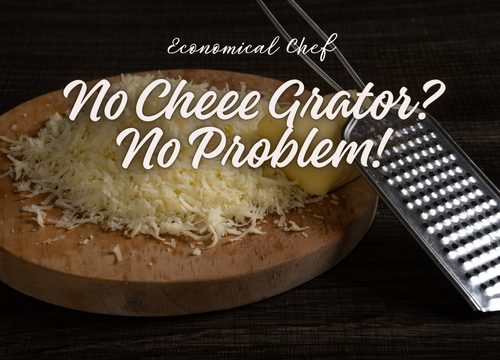
Running out of tools mid-recipe happens more often than most cooks admit. You’re halfway through prepping a pasta, salad, or baked dish—and suddenly realize your electric cheese grater is out of battery or your shredder is missing. The good news? As any professional chef will tell you, a grater is convenient, not essential.
The visual guide above walks through five practical methods you can use right now with common kitchen tools. Below, I’ll break each one down with real kitchen insight—what works, what doesn’t, and when to use each technique.
Why You Don’t Always Need a Grater
Before we jump into the methods, it’s worth understanding this: “grated cheese” is really just cheese broken down into smaller pieces for better melting, texture, and distribution.
As long as you can:
- Increase surface area
- Keep pieces relatively even
- Avoid overheating or smearing
—you can replicate the result without a traditional grater.
Here is the 5 Easy Methods to Grate Cheese Without a Grater
1. Use a Knife (Fine Chopping Method)

This is the most accessible and reliable method—exactly as shown in the image where the cheese is finely chopped into small, crumb-like pieces.
How to Do It:
- Slice the cheese into thin strips.
- Stack the strips and cut into small cubes.
- Run your knife repeatedly over the pile to mince it finer.
Chef’s Tip:
Use a sharp chef’s knife and keep your movements controlled. A dull blade will crush the cheese instead of cutting it cleanly.
Best For:
- Semi-hard cheeses like cheddar, mozzarella, or gouda
- Recipes where melt consistency matters (like pasta or casseroles)
Pros:
- No special tools needed
- Good control over texture
Cons:
- Takes a bit of time
- Not ideal for ultra-fine grating
2. Use a Food Processor (Fastest Method)
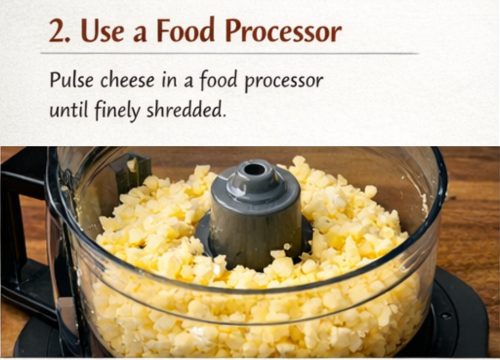
The image clearly shows cheese being pulsed in a food processor into evenly broken pieces. This is the closest alternative to a box grater in terms of efficiency.
How to Do It:
- Cut cheese into small chunks.
- Add to the processor bowl.
- Pulse in short bursts until you reach the desired texture.
Chef’s Tip:
Don’t over-process. Continuous blending turns cheese into a paste—especially with softer varieties.
Best For:
- Large batches
- Meal prep
- Pizza toppings or bulk cooking
Pros:
- Extremely fast
- Consistent results
Cons:
- Requires a machine
- More cleanup
3. Use a Vegetable Peeler (Shaving Method)
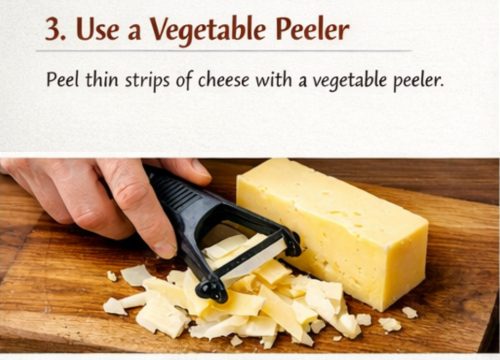
In the image, thin cheese strips are shaved using a peeler. This technique creates delicate slices rather than traditional shreds.
How to Do It:
- Hold the cheese block firmly.
- Run a vegetable peeler along the surface.
- Collect thin strips or curls.
Chef’s Tip:
Chill the cheese slightly before peeling. It firms up the texture and gives cleaner slices.
Best For:
- Hard cheeses like parmesan or pecorino
- Garnishing salads, pasta, or soups
Pros:
- Elegant presentation
- Very little effort
Cons:
- Not suitable for melting evenly
- Doesn’t create fine shreds
4. Use a Microplane or Small Grater Alternative
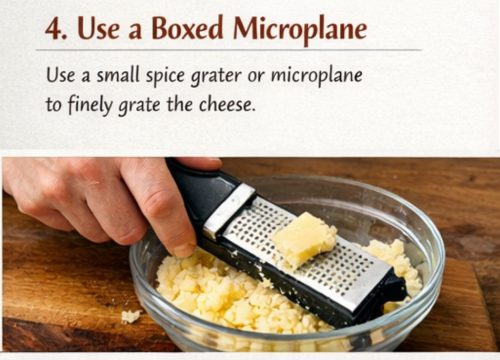
As you can see in the image, a microplane-style tool produces very fine cheese crumbs—almost powdery in texture.
Even if you don’t have a box grater, many kitchens still have a small spice grater or microplane.
How to Do It:
- Hold the microplane over a bowl.
- Rub the cheese gently against the surface.
- Let the fine shavings fall naturally.
Chef’s Tip:
Apply light pressure. Let the tool do the work—pressing too hard can cause clumping.
Best For:
- Hard cheeses
- Finishing dishes (pasta, risotto, soups)
Pros:
- Very fine, fluffy texture
- Professional presentation
Cons:
- Works slowly
- Limited to smaller quantities
5. Use a Fork (Crumbing Method)
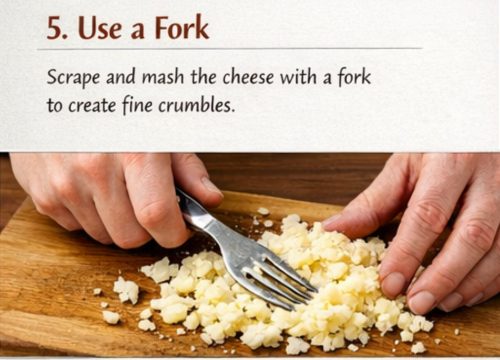
The final image shows cheese being mashed and scraped with a fork into small crumbles. This is a simple, underrated method.
How to Do It:
- Place cheese on a cutting board.
- Press and drag a fork across the surface.
- Break it down into small pieces.
Chef’s Tip:
This works best with slightly softer cheeses. If the cheese is too hard, let it sit at room temperature for a few minutes.
Best For:
- Soft to semi-soft cheeses
- Quick toppings
Pros:
- No equipment needed
- Very quick
Cons:
- Uneven texture
- Not ideal for melting applications
Choosing the Right Method
Each method has its place in a real kitchen. Here’s a quick way to decide:
- Need speed? → Food processor
- Need control? → Knife
- Want presentation? → Vegetable peeler
- Need fine texture? → Microplane
- No tools at all? → Fork
Final Thoughts
A missing grater should never stop you from cooking. As the image demonstrates, there’s always a practical workaround using tools you already have in your kitchen.
From a chef’s perspective, adaptability is just as important as equipment. Whether you’re prepping a quick weekday meal or finishing a dish for presentation, these five methods will keep your workflow moving without compromise.
Once you try them, you might even find yourself reaching for these alternatives—even when your grater is right there in the drawer.