A glass water filter pitcher is an easy and affordable way to enjoy cleaner, better-tasting drinking water. However, even the highest-quality pitcher is only as effective as the filter inside it. Over time, activated carbon and other filtration media become saturated with contaminants, reducing the filter’s ability to improve taste, odor, and remove certified impurities. That’s why learning how to replace a water filter pitcher filter is an essential part of maintaining your pitcher.
As a chef, I rely on clean, fresh water for everything from brewing coffee and tea to washing produce and preparing soups. Replacing the filter on time not only keeps your water tasting great but also helps your pitcher perform as intended. In this guide, I’ll walk you through when to replace your filter, how to install a new one, and the common mistakes to avoid.
Why Replacing Your Water Filter Matters
Most water filter pitchers use activated carbon, ion exchange resin, or a combination of filtration media. As water passes through the cartridge, these materials gradually lose their ability to trap chlorine, odors, sediment, and other contaminants.
According to the U.S. Centers for Disease Control and Prevention (CDC), home water filters should be maintained according to the manufacturer’s recommendations, including replacing filters regularly to help prevent germs from growing inside the filter.
Replacing your filter on schedule helps ensure:
- Better-tasting drinking water
- Consistent filtration performance
- Reduced chlorine taste and odor
- Improved flow rate
- Lower risk of bacteria growing inside an expired filter
Signs It’s Time to Replace the Filter
Even if you haven’t reached the recommended replacement date, your pitcher may already be telling you it’s time for a new filter.
Watch for these signs:
- Water filters noticeably slower than usual
- Tap water tastes or smells like chlorine again
- The filtered water has an unusual taste
- Your filter replacement indicator has turned on
- You’ve reached the manufacturer’s recommended capacity
If your pitcher includes a filter life indicator, don’t ignore it. It’s designed to help you maintain optimal filtration.
How Often Should You Replace a Water Filter Pitcher Filter?
Replacement intervals vary by brand and filter type.
Most manufacturers recommend replacing pitcher filters:
- Every 40–120 gallons (150–450 liters) of filtered water
- Approximately every 2 to 6 months, depending on usage
A larger household that filters several pitchers a day will likely need replacements more often than someone living alone.
Always follow your specific manufacturer’s recommendations, as different filters have different capacities.
Step-by-Step: How to Replace a Water Filter Pitcher Filter
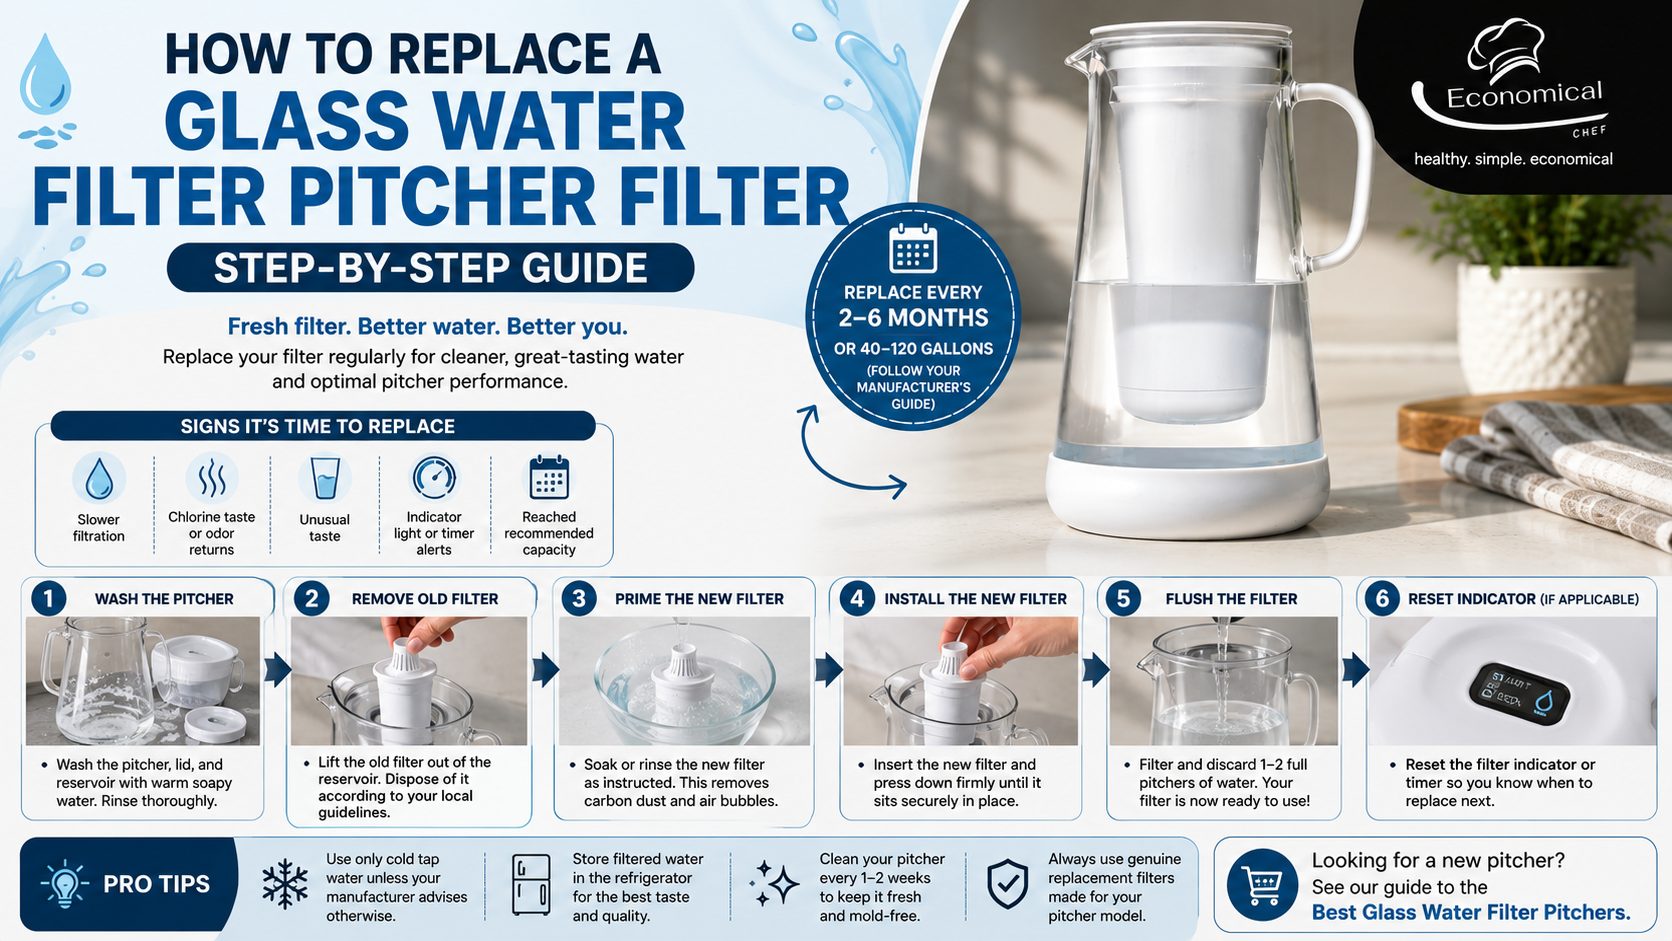
If you’re considering upgrading your current pitcher or comparing different filtration systems, don’t miss our Comprehensive Guide to the Best Glass Water Filter Pitchers, where we review the top models based on filtration performance, durability, ease of maintenance, and overall value.
Step 1: Wash the Pitcher
Before installing a new filter:
- Empty any remaining water.
- Remove the old filter.
- Wash the glass body, lid, and filter reservoir with warm water and mild dish soap.
- Rinse thoroughly.
Installing a fresh filter into a dirty pitcher defeats the purpose of replacing it.
Step 2: Remove the Old Filter
Lift the old cartridge straight out.
If it has been installed for several months, it may feel snug due to mineral buildup. Pull gently without twisting excessively.
Dispose of the used filter according to the manufacturer’s instructions.
Some brands offer recycling programs for used cartridges, making disposal more environmentally friendly.
Step 3: Prime the New Filter
Many activated carbon filters need to be primed before use.
Depending on the manufacturer, this may involve:
- Soaking the filter in cold water for several minutes
- Running water through the filter
- Gently tapping the filter to release trapped air bubbles
Priming removes loose carbon dust and prepares the filter for normal operation.
Always follow the instructions included with your replacement cartridge.
Step 4: Install the New Filter
Insert the new filter into the reservoir.
Press firmly until it sits securely.
Some filters twist into place, while others simply push down into the housing.
Make sure there are no gaps where untreated water could bypass the filter.
Step 5: Flush the Filter
Most new filters require one or two full pitchers of water to be filtered and discarded before drinking.
This initial flush removes harmless carbon particles left from manufacturing.
After flushing, your pitcher is ready for everyday use.
How to Dispose of Old Filters
Used water filters shouldn’t always go directly into household trash if recycling is available.
Check whether your manufacturer offers:
- Mail-back recycling programs
- Retail drop-off locations
- Recycling partnerships
If recycling isn’t available in your area, dispose of the cartridge according to your local waste management guidelines.
Mistakes That Reduce Filter Performance
Replacing the filter is simple, but a few common mistakes can shorten its lifespan.
Waiting Too Long
An expired filter won’t necessarily stop working overnight, but its effectiveness gradually declines.
Replacing it on schedule ensures consistent filtration.
Skipping the Priming Step
Installing a dry filter without priming can lead to slow filtration and carbon particles appearing in your water.
Forgetting to Flush the New Filter
Discarding the first one or two filtered batches removes loose carbon dust and improves taste.
Using the Wrong Replacement Filter
Always purchase replacement cartridges designed specifically for your pitcher model.
An incompatible filter may not fit properly or deliver the expected filtration performance.
Storing the Pitcher Improperly
Keep your filtered water refrigerated whenever possible and avoid leaving the pitcher in direct sunlight.
Proper storage helps maintain water quality between refills. (CDC)
Pro Tips for Extending Filter Life
To get the most from every replacement filter:
- Filter only cold tap water unless your manufacturer advises otherwise.
- Clean the pitcher every one to two weeks. Visit our Chef’s step-by-step guide on how to clean filter pitcher to learn more.
- Replace filters according to the recommended schedule.
- Avoid filtering water that contains visible sediment unless your filter is designed for it.
- Keep the pitcher refrigerated after filling.
These simple habits help maintain both water quality and filter efficiency.
Final Thoughts
Knowing how to replace a water filter pitcher filter is one of the easiest ways to keep your glass water filter pitcher performing at its best. A fresh filter improves taste, maintains consistent flow, and helps ensure your drinking water stays as clean as your filtration system is designed to provide.
If you’re considering upgrading your current pitcher or comparing different filtration systems, don’t miss our comprehensive guide to the Best Glass Water Filter Pitchers, where we review the top models based on filtration performance, durability, ease of maintenance, and overall value.
References
- Centers for Disease Control and Prevention (CDC). About Choosing Home Water Filters. https://www.cdc.gov/drinking-water/prevention/about-choosing-home-water-filters.html
- Centers for Disease Control and Prevention (CDC). Preventing Waterborne Germs at Home. https://www.cdc.gov/drinking-water/prevention/preventing-waterborne-germs-at-home.html
- Centers for Disease Control and Prevention (CDC). Safe Water Storage. https://www.cdc.gov/global-water-sanitation-hygiene/about/about-safe-water-storage.html